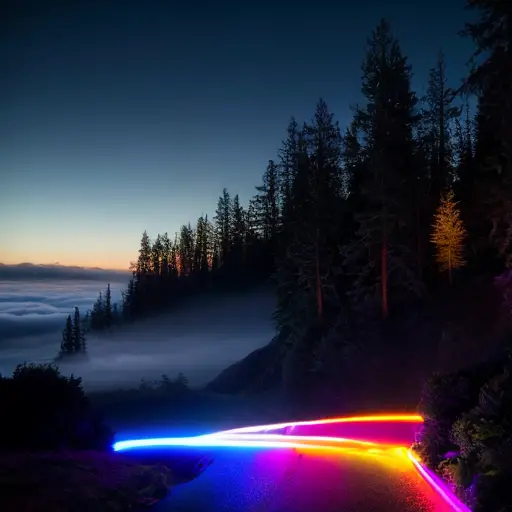
Alright, folks, gather 'round and prepare to have your minds illuminated! Today, we're diving into the enchanting world of light painting. Picture this: you're armed with a camera, a dash of creativity, and a whole lot of glow sticks. As you twirl and dance in the darkness, your camera captures the mesmerizing trails of light you create. But how does this sorcery work, you ask? Well, my curious friends, light painting is all about playing with long exposure photography. By leaving the camera's shutter open for an extended period, it allows us to capture the beautiful dance of light as it gracefully pirouettes through the air. So, grab your camera and let's embark on a journey to unveil the magic of light painting!
Light painting works by using long exposure photography techniques to capture the movement of light sources in a dark environment. By setting a camera to a slow shutter speed and moving a light source in front of it, the camera sensor captures the path of the light, creating stunning and ethereal images. This technique allows artists to 'paint' with light, creating mesmerizing patterns, shapes, and even words in the air. The possibilities are endless, as different light sources, colors, and movements can be combined to produce unique and captivating light paintings.
Alright, fellow light painters, it's time to gear up and get our creative juices flowing! When it comes to this whimsical art form, having the right tools in our arsenal is key. First things first, we need a camera that allows us to control the shutter speed and aperture settings. This gives us the power to manipulate the exposure and capture those dreamy light trails. Next, we can't forget about our trusty light sources - whether it's glow sticks, LED lights, or good old-fashioned flashlights, these magical wands are what bring our visions to life. And let's not overlook the importance of a sturdy tripod to keep our shots steady and blur-free. So, grab your camera, gather your lights, and let's dive into the world of light painting, armed with the tools of the trade!

Are you ready to become a master of light painting? Buckle up, my friends, because I'm about to take you on a step-by-step journey to creating jaw-dropping light paintings that will leave everyone in awe. First things first, find a location with minimal light pollution. We want our canvas to be as dark as possible to let our light sources shine. Once you've found the perfect spot, set up your camera on a sturdy tripod and switch it to manual mode. This gives us full control over the exposure settings, allowing us to capture the magic of light. Now, let's talk about the exposure time. Since light painting involves long exposures, start with a shutter speed of around 15-30 seconds. This gives you enough time to create your masterpiece without overexposing the image. Experiment with different exposure times to achieve the desired effect. Now, it's time to unleash your creativity! Grab your light sources - glow sticks, LED lights, or even sparklers - and start painting in the air. Move them around, twirl them, and let your imagination run wild. Remember, the longer you expose the light, the brighter and more prominent it will appear in the final image. Play around with different movements and patterns to create unique and captivating compositions. Don't be afraid to experiment and try new techniques. Light painting is all about pushing boundaries and letting your artistic spirit soar. So, go out there, embrace the darkness, and let your light shine! With practice and a sprinkle of imagination, you'll soon be creating stunning light paintings that will leave everyone spellbound. So, grab your camera, gather your lights, and let's embark on this magical journey together!
Light painting works by using long exposure photography techniques to capture the movement of light sources in a dark environment. By moving a light source, such as a flashlight or glow stick, in front of the camera during a slow shutter speed, the light trails are recorded as streaks or patterns in the final image. This allows for creative and artistic effects, where the photographer can 'paint' with light to create unique and mesmerizing visuals.
Let's take a moment to unravel the scientific secrets behind the captivating art of light painting. At its core, light painting is a dance between physics and optics. When we move a light source through the air, the camera's shutter remains open, capturing the path of light as it travels. This is possible due to the concept of long exposure photography, where the camera's sensor accumulates light over an extended period. As the light moves, it leaves a trail of photons, creating those mesmerizing streaks and patterns we see in light paintings. The intensity and brightness of the light source, combined with the duration of the exposure, determine the final result. So, next time you're twirling a glow stick or waving a flashlight, remember that you're not just creating art - you're also exploring the fascinating interplay between light, time, and the laws of physics.