Alright, fellow art enthusiasts, let's dive into the world of canvas painting flaws and how to fix them like a pro! Assessing the damage on your beloved artwork can be a bit like playing detective, but fear not, we've got your back. First things first, keep those magnifying glasses away, Sherlock, and grab a soft brush instead. Dust off any pesky dirt or grime gently, because nobody wants a Mona Lisa with a five o'clock shadow. Next up, those dreaded tears and holes. Don't panic, my friends! Grab some trusty canvas patches and a strong adhesive, and get to work like a master seamstress. Smooth out those wrinkles, blend the colors seamlessly, and voila! Your artwork will be back on its feet, looking as good as new. Remember, folks, even the most flawless paintings have their flaws, but with a little TLC, you can turn those imperfections into a masterpiece. Happy repairing!
An interesting fact about repairing canvas paintings is that conservators often use a technique called 'in-painting' to repair damaged areas. In-painting involves carefully filling in missing or damaged sections of the painting with new paint that matches the original colors and style. However, what makes this process fascinating is that conservators use a special type of paint that is reversible, meaning it can be easily removed in the future without causing any harm to the original artwork. This allows for future generations to have the option of reevaluating the restoration work and potentially making different choices, ensuring the preservation of the artwork's integrity and history.
Alright, my fellow art aficionados, let's talk about prepping that canvas and giving your artwork the spa treatment it deserves! Cleaning and restoring your beloved masterpiece may sound like a daunting task, but fear not, we've got some tricks up our paint-stained sleeves. First things first, grab a soft, lint-free cloth and gently wipe away any dust or dirt that may have settled on your canvas. Think of it as giving your artwork a bubble bath, minus the bubbles. Now, for those stubborn stains and discolorations, it's time to bring out the big guns. Grab a mild soap and mix it with some lukewarm water, then carefully dab the affected areas with a soft brush. Remember, gentle strokes are key here, folks. Once you've tackled those blemishes, it's time to let your artwork dry in a well-ventilated area, away from any direct sunlight. And just like that, your canvas will be fresh, clean, and ready to shine once again. So go ahead, give your artwork the TLC it deserves, and watch it come back to life before your very eyes. Happy cleaning and restoring, my friends!
Alright, my fellow art enthusiasts, let's delve into the art of mastering the technique of repairing canvas tears and holes like true maestros! We've all been there, staring at our beloved artwork with a sinking feeling as we notice those unsightly blemishes. But fear not, for with a little patience and skill, we can restore our canvas paintings to their former glory.
First things first, gather your tools of the trade. You'll need some canvas patches, a strong adhesive, a palette knife, and a steady hand. Assess the size and location of the tear or hole, and cut a patch slightly larger than the damaged area. Now, carefully apply the adhesive to the back of the patch, ensuring even coverage. With the precision of a surgeon, place the patch over the tear or hole, gently pressing it down to secure it in place.
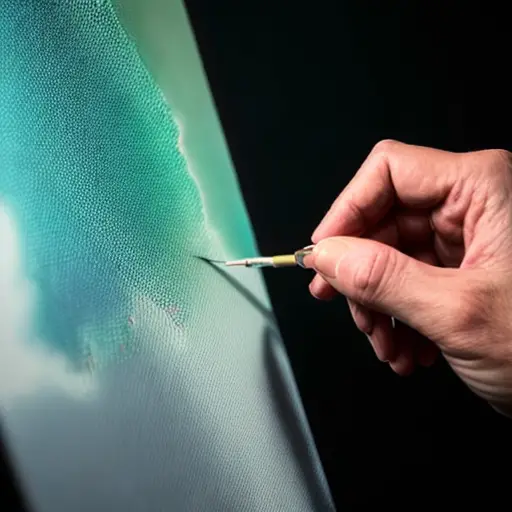
Once the patch is in position, it's time to blend it seamlessly with the surrounding canvas. Grab your palette knife and some acrylic paint that matches the colors of your artwork. With delicate strokes, apply the paint to the patch, gradually blending it with the surrounding area. This step requires a keen eye for color and a steady hand, but with practice, you'll become a true master of disguise.
Now, let's talk about those pesky wrinkles that can sometimes appear after patching. Fear not, my friends, for we have a solution. Grab a clean, damp cloth and gently press it over the patched area. Apply a bit of heat using a hairdryer on low setting, and watch those wrinkles disappear like magic. Just be sure to maintain a safe distance to avoid any mishaps.
Finally, step back and admire your handiwork. With a little patience, skill, and a touch of artistic finesse, you've successfully repaired those canvas tears and holes. Remember, my friends, every masterpiece has its flaws, but with the right techniques, we can turn those imperfections into a testament of our dedication to preserving the beauty of art. So go forth, my fellow art restorers, and let your skills shine as you breathe new life into your beloved canvas paintings. Happy repairing!
A fun fact about repairing canvas paintings is that sometimes, a technique called 'inpainting' is used to fill in missing areas of the artwork. This involves using a special paint mixture that matches the original colors and texture of the painting, allowing the restorer to seamlessly blend the repaired sections with the rest of the artwork. It's like giving the painting a little touch-up, making it look as good as new!
Now that we've mastered the art of repairing canvas paintings, it's time to talk about preserving our masterpieces for years to come. After all, we want our artwork to withstand the test of time, just like the classics. Once you've completed the necessary repairs, it's crucial to apply a protective varnish to shield your canvas from dust, UV rays, and other potential hazards. Choose a varnish specifically designed for acrylic or oil paintings, and apply it with a soft brush in thin, even layers. This final touch not only enhances the colors and depth of your artwork but also acts as a shield, ensuring its longevity. Additionally, remember to display your masterpiece in a controlled environment, away from direct sunlight, extreme temperatures, and high humidity. By following these conservation tips, you can preserve your repaired canvas painting and enjoy its beauty for generations to come. So, my fellow art enthusiasts, let's protect our masterpieces and keep the magic alive!